Monday, November 30, 2015

Concert Madness

Concerts have changed a lot since I used to go, and I blame cell phones for any of the things that are worse now than they used to be.

Barenaked Ladies
First of all, I have to say the concert was great. I've always like Canadians, but these boys give their countrymen a very good name.

They sang most of my newly learned favorite songs, and they brought an energy to their songs that was very appealing and highly enjoyable. If given the opportunity, I would absolutely recommend seeing these guys.


I didn't end up getting to meet them at a pre-concert reception, which I was kind of relieved about.

Vacation Reading
I forgot to mention that I ended up reading two books while on vacation last week.


The Traveler by John Twelve Hawks was an interesting fantasy novel that harshly criticizes the constant encroachment of government and commercial industry on our privacy and civil liberties. This isn't usually the type of novel I would read, but it was enjoyable, light reading. Perfect for vacation.


Breakfast at Tiffany's by Truman Capote, was an excellent little short story, that I read after having seen the movie, Capote. I loved getting wrapped up in the lives of the two main characters. It was the first time I had read anything by Capote, and I can clearly see why his writing is considered genius. There were three shorter stories in this book that I also enjoyed reading. I've also purchased In Cold Blood and I'm looking forward to starting it in the near future.

Readers' Comments/Questions
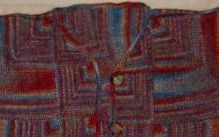
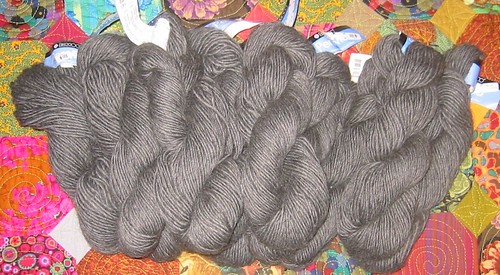
Marilyn asks, "So what's the lace garment? Or is it a secret?"

It's going to be a rectangular wrap. Currently, I'm planning on making the center panel with three diamonds going across, over a background of a very loose lace pattern stitch. Once that part is done, I'll try to figure out an appropriate border.

Carol S. asks, "Isn't 'southwestern style' a bit of an oxymoron?"

I know she asked this as a joke, but I have seen some extremely well done interiors done in Southwestern, but it takes a true expert to do it well. I liken it to the difference between some nerd mixing stripes and plaids, and Kaffe doing the same thing.

Let's Hear It For New Hampshire!


It's nice to find a state that is doing something to promote women's health.

Cervical Cancer Vaccine
Given the lack of news coverage on the fact that cervical cancer is caused by a virus (human papillomavirus — or HPV), it's wonderful news to read that the state of New Hampshire has decided to offer free vaccines for HPV to girls between the ages of 11 and 18.

For those folks that think that all vaccines have the potential for causing autism, or that vaccinating girls for HPV will make them more apt to have pre-marital sex, I would just say, don't let your daughters get the vaccine. If you're one of those people that says "I don't want to have my state taxes go towards free vaccines." I say, there are a lot of things my taxes pay for that are completely objectionable, so get over your selfish self.

I can only hope that New Hampshire is a trendsetter, and that other states follow their lead on this important issue.

Current Knitting
The Araucania jacket is coming along nicely (it looks like a badly knit scarf so far), as I've almost finished the first strip of 10 colored strips.


I've realized that this jacket will be approximately 3,000 rows of garter stitch in color and an additional bunch of rows in single color. I might have picked a more interesting project, after just having finished a mitered square project.

Current Spinning
I've done a lot of spinning on the third bobbin of multi-color merino singles, despite what pictures might indicate.


Oh look, I've caught Roomba making its rounds near my spinning...that clever little vacuum-bot.

Readers' Comments/Questions
Friend Kathy writes (with way too many question marks, I might add), "I know Carol pretends I don't exist and never did, but you??????"

She is referring to the fact that I didn't include her as one of the owners of Simply Knit in Lambertville. She was in fact one of the founding owners, and great designers of that wonderful yarn store. The reason I didn't include her amongst the owners, was that she had left before the final two owners decided to close down. I also didn't mention a fourth owner, Susan, for the same reason.

A little felted purse KAL, part 1

The current issue of Interweave Knits has an article (by me) about installing zippers without any sewing at all, using a very special kind of very small latch hook called a "knit-picker."  There are two different methods described in the article for installing zippers:  working from the zipper outward, or installing a zipper in an already-made item.  There is also an Interweave Knits video on the technique.

If you have a copy of the article, or have viewed the video, and would like to explore the method of working from the zipper outward, here is a pattern for a little felted purse using that technique. The project is presented as a KAL  (knit along) in several installments.  Today, we'll lay out the materials and get as far as the top trim.


With its flat bottom, this little purse is roomy beyond expectation: a cell phone and other necessaries fit neatly alongside bills and change. Made up in an afternoon, these are great for gifts too.

Materials, needles and gauge
*Scrap amount of superwash worsted weight yarn, the model uses Cascade 220 superwash--this is the lavender trim at the top of the purse
* Scrap amount of ordinary (feltable) woolen yarn in contrast color, the model uses Cascade 220 in green
* Approx 1/2 ounce ordinary (feltable) woolen yarn in main color, the model uses Cascade 220 in dark purple
*Closed-end nylon or polyester coil zipper in matching color
*"Knit-picker" type mini latch-hook--this is explained in the magazine article
*Crochet hook in size to match yarn
*large eyed sewing needle
*set of 5 small dpn's to give gauge of about 6 st/in
*set of 5 larger dpn's to give gauge of about 5 st/in

The average finished size is 3" (L) x 2.5" (H) x 2.25" (W) but this can vary by as much as 1/4 inch larger or smaller in each measurement, depending on how much felting you choose to do.

KAL Part 1: Zipper and Top Trim
Shorten zipper to 3 3/4 inches working length as shown in the Interweave Knits article, or however you usually shorten a zipper.

Per illustration 1 above, mark zipper tape for pick up--two dots across each end of each tape, and 12 evenly spaced between, as shown. (Zippers have seam guides woven into them, so finding a straight line along the tape is easy.)

Superwash top trim: Using smaller dpn's, mini-latch hook (aka "knit-picker") and the knitting needle method described in the Interweave Knits article, and using 1 dpn for each side of zipper tape, pick up 1 st for each dot.

Begin the pick up at the arrow, working down the left zipper tape first.  Ignore the square and different colors for the moment: for the purpose of picking up stitches, each dot equals one loop to be picked up through the zipper tape.


Per illustration 2, above, once you have picked up the stitches through the zipper tape, it should look like this, with one needle holding all the stitches on one side of the zipper tape, and a second needle holding all the stitches from the other side of the tape.

Arrange the picked up sts on 4 dpn's: 6 across each end and 10 along each side. Needle 1 holds purple dot stitches; needle 2, green dot stitches; needle 3, blue dot stitches; needle 4, brown dot stitches. You could re-arrange the stitches onto the four dpn's by sliding the six end loops around onto their respective needles, but these loops are tight, and it's easy to lose one.  Therefore, in practice, the easiest way is to re-arrange the stitches by is by knitting them off when working the second round.

Second round: In this round, besides re-arranging the stitches onto 4 dpn's, you'll also increase stitches using the kfb method, all along the sides of the zipper tapes.  This increasing gives the purse its boxy shape. Here's how:

Bring yarn through zipper tape opening at pink square and commence to knit in direction of pink arrow as follows: Work 1 st in each of the 3 purple dot sts on needle 1, kfb in each of the 10 green dot stitches on needle 2, work 1 st in each of the 6 blue dot sts on needle 3, kfb in each of the 10 brown dot sts on needle 4, end round by working 1 st on each of the 3 remaining purple dot stitches on needle 1, you'll have 52 total sts on needles.

(Click here for further information about kfb--knit front and back.)

Work for 7 add'l rounds, knitting plain. Bind off. Top trim made. Note: the trim lies purl side out, with the knit side curling towards the zipper teeth, as shown in the opening illustration.

(Click here for a method of binding off in the round which hides the gap appearing at the last stitch of an ordinary bind off)


This is the first in a three-part series.

Click here for the second part of the series
Click here for the third part of the series
Click here for the accompanying video tutorial 

Good knitting!
--TK

Saturday, November 28, 2015

Raunchy Girls


If you think the blog title for today is just to get more hits, you are wrong (although, not an unfair assumption).

Girls Gone Wild
I heard a promo on NPR yesterday, for today's Fresh Air show. It was going to be a show about the "age of raunch" for women, and why women today would want to expose themselves in videos, such as "Girls Gone Wild."

I'm not a woman, and I don't presume to speak for them, but the topic of the radio show did pique my curiosity.

Most of the women I've seen in the advertisements for this silly video are attractive enough to entice sexual partners without publicly baring their breasts. I don't think these women get any money for flashing the camera. Other than perhaps shame and infamy, there is little fame or recognition for showing their tatas.

So why would they do it? Are they just drunk and easily convinced? Are they trying to show that they are unfettered by self-conciousness? Are they making a statement, such as my blog name, that tries to reclaim their body with an in-your-face display of their bust? Or perhaps, it's low self-esteem that makes them feel more accepted for doing it?

I didn't get to listen to Fresh Air, so I don't know what their hypothesis is, but I'd be interested to hear what others think.

Current Knitting
I finally decided to start work on a Carol Lapin design that I've had the pattern and yarn to make, for a few years now.


This is the beginning of one of 10 multi-color panels that will be put together as a coat when it's all done. I think this design was published in one of the "Simply Knit" book series, but I don't remember the name, and I don't have my books with me at the moment. The pattern was originally designed using Araucania yarn, and then adapted to Jamieson Shetland, so it could be published by Unicorn.

I'm doing it in the much more interesting and rich colors of Araucania.

Readers' Comments/Questions
Regarding the just-finished Aunt Dorothy jacket, Tricky Tricot asks, "What did you do with the collar?"

The neck shaping is done by adding two triangles at the top of the small squares. A simple crochet edging was done around all the outer edges as well, including the collar.


And to answer Ted's question, "You did a row of slip stitch crochet around the edge?"

It was actually two rows of single crochet around the front opening and neck and a few more at the bottom to get as much lenght from the yarn as I could.

Ronni writes, "I have a question. I used to go to Simply Knit in Lambertville and also used to buy fabulous sweater kits at stitches east.
Do you know what happened that they are no longer in business?"

I don't know for sure, and I don't have any juicy gossip about them. I too loved Simply Knit and their predecessor in Lambertville, The Tomato Factory. Carol and CeeCee were the owners of the store, and I think they decided it was time to call it quits, and retire. Nothing more interesting than that.
Southwestern Style

As a decorating style, I have never been too fond of "Southwestern," but it seems my living room has taken on that flavor despite any personal preferences.

Outside Influences
When Thaddeus and I first bought our house about 15 years ago, we decided we were in no rush to furnish or decorate the place. We made a concious decision to find good furnishings that we both liked, and not hurry through the process.

One of the first pieces of furniture we bought for our living room is a beautiful thick, cherry wood couch with cushions. We had a choice of upholstery, and selected a fabric that turned out looking a bit more Southwest than I would have expected.


While I still love the couch, many of our friends or family that came to the house assumed we were going for a Southwestern look, and bought gifts that reflected that. So, despite the fact that this is the only Southwester-looking piece of furnitrue in the house, folks still seem to think we're decorating in a Southwestern style.

Current Knitting
It seemed odd to me that the scarves I knit whilst on vacation in Arizona had a distinctly Southwestern feel to them, and it was completely unplanned.

I've decided to start a new project, using the laceweight merino I bought from Skaska Designs at Rhinebeck.


I'm designing my own lace garment, so between the incredibly small gauge for this yarn and the trial and error nature of my design process, I don't expect to have this project grow incredibly fast at the beginning.

New Web Site
I got an e-mail from new blog-knitter, Matt, and thought folks might like to take a look at his web site.

Readers' Comments/Questions
Emma asks via e-mail, whether she could purchase the Koigu Cross Stitch Scarf pattern directly from me, instead of getting it from The Knitting Vault.

Emma, I tried to respond via e-mail, but your e-mail address errored out on me, so I'll answer your question here for everyone to see. You can purchase the pattern directly from me for the same price as The Knitting Vault, but there are two hitches. First, I don't send a pattern with a picture, like you'll get on the Knitting Vault, and second, you'll have to use PayPal to buy it from me, whereas, TKV takes charge cards. I also have an agreement with TKV to not sell the pattern for any less than I charge on their site.

Step-by-step Kitchener stitching with a sewing needle: stockinette, reverse stockinette and garter stitch

This is the second post in a four-part series on Kitchener-stitching with a sewing needle.


NOTE:  The illustrations are numbered sequentially across the entire series.  This post begins with illustration 3: illustrations 1 and 2 are found in the first post.

* * *


Kitchener stitch: knitting with a sewing needle

As we saw in the first post of this series, when you unite two fabrics by the contrasting-color ("cc" or "chimney") method, you are actually making a row of knitted fabric with a sewing needle. Odd but true: you’re knitting with a sewing needle. Knitting, as you know, really has only two stitches, the knit and the purl. Because it is possible to duplicate both of these with a sewing needle, this means that many different knitted fabrics can be seamed head-to-head by the Kitchener stitch, and we’ll go to fabric-specific instructions later in this post. Yet, regardless of what fabric we want to graft, there are some techniques common to most Kitchener-stitching, so we’ll look at those, first.

Set up, switching, cycle-sequence and passing

For almost all types of Kitchener-stitching, the live loops to be grafted are set up on two needles. The fabrics to be grafted are held back to back. The yarn to be used for grafting is the running yarn of the back piece, cut to a workable length and threaded onto a tapestry needle, the yarn from the front fabric is dropped and not used.

The Kitchener stitch is performed in a four-stitch cycle: per illustration 3, the four stitches are called Front-1 (F1, orange), Front-2 (F2, green), Rear-1 (R1, blue) and Rear-2 (R2, tan).

Each four-stitch cycle of Kitchener-stitching consists of a six-step sequence:
1) The grafting yarn is switched forward
2) The grafting yarn is passed through the first live loop on the front needle, F1, and F1 is dropped off the front needle.
3) The grafting yarn next passes through neighboring front loop, F2, which is retained on the needle.
4) The grafting yarn is then switched to the rear.
5) Next, the grafting yarn passes through the first live loop on the rear needle, R1, which is dropped from the needle.
6) The 4-stitch cycle ends when the grating yarn passes through the neighboring loop, R2, which is retained on the knitting needle. The cycle begins anew when the yarn is again switched forward.

In sum, the 6 steps are: switch, pass, pass, switch, pass, pass.

We’ll soon get to the details of passing (how and which way) but first, a few trouble spots to nip in the bud.
  • In your set-up, learn to hold the front needle below the rear needle. This gives a clear view of the rear loop to be grafted.
  • Regarding the cycle: every four-stitch cycle starts with a switch forward. If called away during Kitchener stitching, always work through to the nearest R2 so you’ll know where to start again.
  • As to sequence: During each cycle, F1 and R1 are dropped from their respective knitting needles. Therefore, when the cycle begins anew, the old F2 will have moved up in the sequence to the F1 position. Similarly, old R2 will have moved up in the sequence to the R1 position. This sequencing rotation has an confusing consequence, as we’ll discuss below.
  • Regarding switching: experience shows that improper switching is the number one cause of Kitchener-stitch failure. Whether switching from front to rear or from rear to front, the grafting yarn is taken around the RIGHT side of the work, in other words, UNDER the knitting needle tips. Do NOT switch over the top of the knitting needles, or you will make a royal mess. Illustration 4.


Direction of passing and the “opposite/same rule”

To emulate the action of a knitting needle, a threaded sewing needle can pass through a live loop either KNITWISE (inserting the sewing needle as you would insert a knitting needle to make a knit stitch) or PURLWISE (inserting the sewing needle as you would insert a knitting needle make a purl stitch) (illustration 5)


Kitchener stitch is based on a simple application of these two possibilities:
If the threaded sewing needle first passes through a live loop in a PURLWISE direction, and then returns in a second pass through that same live loop in a KNITWISE direction, the new stitch thus created by the grafting yarn will be a KNIT stitch.

If the grafting yarn first passes through a live loop in a KNITWISE direction, and then returns in a second pass through that same loop in a PURLWISE directions, the new stitch thus created by the grafting yarn will be a PURL stitch.

The rule to extract is that to regardless of whether you want to make a knit stitch or a purl stitch, the first pass goes the loop in the OPPOSITE direction to the resulting final stitch desired, and the second pass goes through that same loop in the SAME direction as the resulting final stitch desired.

Under this analysis, the 4 combinations of needle insertions of interest for the Kitchener stitch are:

1) First pass: INSERTING THE OPPOSITE, which means
c) insert PURLwise into a KNIT stitch OR
d) insert KNITwise into a PURL stitch.

2) Second pass: INSERTING THE SAME which means
a) insert KNITwise into a KNIT stitch OR
b) insert PURLwise into a PURL stitch


The first pass-opposite/second pass-same rule is simple, but, like many simple things, it gets complicated quickly.

First stitch, second pass; second stitch, first pass

The first thing which complicates the simple application of the opposite/same rule is the rotation through the sequence of the live loops in Kitchener-stitching.

Back in the note about sequence, we said there was a confusing consequence to the fact that, when every 4-stitch cycle begins anew, the old F2 will be in the F1 position and the old R2 will be in the R1 position.

You see, the first stitch, F1, has already received its first pass before it was promoted to its current position. In other words, back when it was in the F2 position, this loop already received a first pass before it was retained on the needle. Now that it has become an F1, it is getting its second pass prior to being slid off the knitting needle. Therefore, when we go to apply the opposite/same rule, we have to remember that even though F1 is the first stitch, it is getting its second pass. Same thing in the rear: although R1 is the first stitch on the rear needle, it is in position to get its second pass.  If you remember this, all of Kitchener stitching with a sewing needle gets a whole lot less confusing.

The zen of the stitches on the rear needle
and
the war between your eyes and your brain

This system for Kitchener stitching is based on applying the first pass-opposite/second pass-same rule. This means we must look at every stitch coming up for grafting and classify it as either a knit or a purl per illustration 6, and then work it same or opposite, as directed.

Yet, as the zen masters say, “what has a front, has a back,” and this front/back issue is the second thing complicating the application of the opposite/same rule.

In set-up, we hold the fabrics to be grafted back-to-back. If grafting stockinette, the stitches below the loops on the rear needle are going to look like purls, because we are looking at the BACK of the stockinette. So, the question arises: should these stockinette-fabric stitches be classified as knits or purls for application of the first pass-opposite/second pass-same rule? The answer is that for our system, we classify by HOW THE STITCHES LOOK FROM THE SET-UP POSITION. Therefore, the stitches on the rear needle when grafting stockinette are purls, because that’s how they look to your eye which sees the back of the rear fabric. If you sneak a peek back to illustrations 3 and 4, you will see examples: the front fabric is stockinette, and the rear fabric shows as the purls of reverse stockinette.

When you come to sort this out in practice, you may find yourself in the middle of a battle between your eye and your brain. See, your brain KNOWS you’re grafting stockinette, so it THINKS it knows those rear stitches are knits, despite the fact that, to your eye, they look like purls from the set-up position. Your brain may scream “you’re grafting stockinette, so that rear stitch is a knit, a knit, I tell you!” Ignore the screaming and trust your eye.

Fabric-by-fabric instructions for grafting by the opposite/same rule

Stockinette, reverse stockinette, ribbing grafted by the double knitting method: Stockinette and reverse stockinette look the same right side up and upside down, and from row to row. They are the easiest fabrics to graft. Ribbing will be covered in the next post of this series, but basically, when you graft ribbing by the double-knitting method (to be explained in the next post) it works the same as grafting a stockinette fabric.

The rule is: F1, same and drop it off; F2, opposite and keep it on; R1, same and drop it off; R2, opposite and keep it on.

Here it is in expanded chart form: (click illustration to greatly enlarge)

Garter stitch: Unlike stockinette, garter stitch fabric changes appearance on the fabric face from row to row, alternating rows of bumps with rows of smooth. Kitchener stitching adds a row, so you must stop knitting when the two garter fabrics to be joined lack the row that would connect them if the knitted item had been knitted all in one piece. In garter stitch, this means that both the front and the rear needles must have the same sort of row showing from the set-up position—either both must have rows of purls below the loops on the needles OR both must have a rows of knits on the loops below the needles. One additional complication: Garter stitch is a backwards application of the opposite/same rule. This is because you don’t want to make the new row you’re adding identical to the stitches in the row above and the row below. Instead, you want to make it opposite, to get the row of bumps in the right place. Therefore, for garter stitch, the rule is first pass same/second pass, opposite.

Once properly set up, the rule for garter stitch is: F1, opposite and slide it off; F2, same and keep it on; R1, opposite and slide it off; R2, same and keep it on.

Here it is in expanded chart form. (click the illustration to expand it greatly)


One last (and important!) thing

This system states that in each 4-stitch cycle, the first stitch gets the second pass-through of the grafting yarn before it is slipped off the knitting needle. This is clearly true for every cycle of Kitchener stitching except for the very first. As to that first cycle (in all fabrics except ribbing grafted to a bound-off fabric) the first F1 which is pushed off the needle has only ever had one pass—worked as a second pass. Some books seek to correct this problem with special passes done only on the very first F1 and R1. However, experience shows that this really does not make a lot of difference to the finished look. Therefore, just treat the F1 and R1 of the first cycle as if they were ordinary second-pass first stitches.


* * *

If these charts and all this theory makes you crazy, not to worry, the contrasting color ("chimney") method (shown in the first installment) works really well, is super easy and produces the exact same result.

In the next post, we'll take up grafting ribbing--without the 1/2 stitch offset (and no complicated charts, either, I promise). 

Until then, good knitting--TK

Frustrated On All Fronts


My travel knitting/crocheting it totally screwed up this week and I'm left working on a project I'm not enjoying at the moment.

Bad Knitting Week
I brought three projects to Delaware this week to work on.
1. The crochet tablecloth
2. The alpaca herd jacket
3. A new secret project that I may want to publish
Being all excited about the new project (it involves Koigu), I decided to work on that mostly this week to try and get it finished. Searching through my travel-knitting bag, I realized I hadn't brought the crochet hook with me for this project (see, you're finding out more about it than I cared to tell...it's a crochet project!).

I then started working diligently on the Alpaca Herd Jacket. Alternating between balls of yarn, I finished the sleeve shaping and was just about to get to the collar shaping when I realized I hadn't brought any extra balls of yarn. I had to put this project down.


Which left me with the tablecloth. Don't get me wrong, I enjoy doing this fine crochet lace...except when I find a mistake in the work I've already completed. So I've decided to try correcting a few of my mistakes.


You'll see that I've made it look like a person missing teeth, and I still need to take out another large motif...ugh. This kind of fix always seems so daunting and complex, but I guess it really isn't. It is time consuming, however.

Readers' Comments/Questions
Barbara writes, "I've been looking at the Jojoland Harmony - what are the color lengths like - how long are the repeats - do you know?"

I don't know, but if you have access to Ravelry, there are a few projects out there with pictures showing how it knits up.

Cara asks, "Where in Philadelphia can you get silk blend Manos?"

Sherry W. answered that Rosie's Yarn Cellar has it, and I got it at Twist in New Hope (I think).

Adam Spector Hodgkins Memorial Fund

Friday, November 27, 2015

Arizona Dissappointments

Back from a week-long trip to the Grand Canyon State (although, we didn't go to the Grand Canyon) and I have mixed emotions about Arizona now that I've seen some of it.

The Good, The Bad and The Ugly
First of all, we stayed in a lovely Westin resort in Scottsdale. The Phoenix/Scottsdale area is beautiful and our weather was perfect. I even got to spend some time around the pool. The Phoenix area has some very nice restaurants. One Thai place in particular, Thai Lana, had excellent food that we enjoyed a lot.

However, I couldn't ever see my self living in Scottsdale. It would feel too much like being a regular character on the Golden Girls. Everything seemed so staged, that I don't think I would enjoy living there at all.

On Tuesday, we took an overnight trip down to Bisbee, Arizona, which is about 2 hours Southeast of Tuscon (which is about 2 hours Southeast of Scottsdale). This was the place we had been investigating via the web for about a year, and neither Thaddeus, nor I was very impressed. It is a lovely town, but the housing is run down and looking dilapidated. I don't think they've ever condemned a building in that town, although we saw a few that should have been. And while I'm sure we could have found a house that would have met our asthetic tastes and our needs, I didn't find that there was anything to do in Bisbee at night, other than go to bars or socialize with friends. There were a couple of good restaurants, but no movie theaters or other entertainment.

Thaddeus did end up buying a hat while we were in Bisbee. There is an exceptional hat store in town, where he found the exact hat he's been looking for.


This isn't the hat he bought. His was a deep gray, rabbit fur, felt hat, that he had customized with a simple black band of leather. It fits him to a "T". The man in the picture was the one who sold us the hat. He, like most of the folks from Arizona I met, was extremely pleasant.

Finally, we went up to Sedona. For those who have been, I don't have to tell you that it's truly beautiful. I didn't take any pictures, because my camera battery died, but feel free to do an image search on Google for Sedona. Other folks have taken much better pictures than I could have anyway.

Current Knitting
I finished a total of three scarves during my travels, all of them using the Brooks Farm yarns and the Koigu Cross Stitch pattern (slightly revised to get the length and width I wanted in the scarves). The first scarf, which was pictured in the last entry, was way too short, so I also made it somewhat narrow and figure it would make a beautiful scarf for a little girl.

Then I made these two scarves.


Here's a closeup of the unblocked fabric.


I love how these scarves turned out, and the Brooks Farm wool/silk yarn was both the perfect fiber and amazing colors.

Fiber Bitches


The sewing and knitting worlds include some of the cattiest, bitchiest people on the planet.

Button Search
I had to go into a neighboring town (Doylestown, PA) on Friday of last week. They have a large fabric/sewing store there, so I brought the completed Dorothy jacket, to try and find two large, interesting buttons.

I was met at the door by one of the rude ladies I've seen there before, who told me the store was closed (yes, closed on Black Friday), and she closed the door without further comment. I noticed signs that said the store was moving on December 4th, which I think is why they were closed.

Fortunately, I had a backup plan. I was going to stop at Twist, to see if Deb carried buttons. She does, so I pulled out my sweater, and got a few very nice "oohs and ahhs", and then started trying different buttons on to see how they looked. I mentioned to Deb that the sweater was easy because I had based it on Nadine Shapiro's design, at which point a customer in the store, who I've never seen or met before, claimed loudly that Nadine had stolen her design, and that she was shocked to see her sweater design show up in a Jamieson book.

Knowing Nadine, I'd have to say she's the last person who would steal a design, so I told the woman that Nadine and I had been to a Barbara Kerr seminar on mitered squares, and Barbara was probably what inspired Nadine to come up with her design. The customer claimed that she had worn her sweater to Simply Knit and Nadine had examined it closely, and then came out with her design. She did also admit that there are limited things that can be done with mitered squares, but her accusations of a friend still annoyed the hell out of me.

Fortunately, it didn't sour my feelings about Twist, because, as usual, I found exactly what I wanted there.

Aunt Dorothy's Sweater - Complete
I washed and blocked the sweater jacket, and then put on the buttons I found at Twist.


The buttons are done by a local woman who using felting techniques. I think the buttons add the exact amount of flair and contrast that I was looking for.


These last two pictures are the most accurate representation of the color of the Brooks Farm yarn that I've been able to capture on my digital camera. Pictures of this sweater often come out much more crayon-bright, when in fact, it's more muted and smokey in its colorway.

Current Knitting
I didn't feel like starting a new project over the holiday long weekend, so I worked on test-knitting my the pattern for the Celestine Shawl.


This was my second time through test-knitting, since I find it extremely difficult to proofread my own knitting patterns. I was very satisfied with the result, so I've posted the pattern design on The Knitting Vault, and Fredda has already gotten it put up on her site (if you ever considered getting the pattern for the Koigu Cross Stitch scarf, or any of my other designs, you can search by Designer Name = "DoublePointed"). I have a feeling that this pattern is going to be a big seller, largely because of the color of Carol's laceweight yarn.

Thursday, November 26, 2015

Avoiding "nipple in the middle:" some tricks to improve hat tops, glove fingertips and motif centers

You may be knitting a pattern starts or ends in the middle, and you may find that the very center stitches are humping themselves up into an unattractive stitch-nipple, a "knipple" as Adri has cleverly named it in the comments. 


One common example is the top of a bottom-up hat. The instructions will often tell you to stop when 8 (10? 12?) stitches remain on your needles, then draw the running yarn though these last remaining stitches. Other common examples include the fingertips of gloves, the tops of mittens and the centers of knitted motifs knitted from the edge to the center. When you thread the running yarn onto a sewing needle and draw the yarn through the last round of stitches remaining, these last few stitches look sloppy--they form an elongated nipple of stitches. This is bad enough on a 3-d object like a hat top, but is a truly sad way to finish off a flat motif (hexagon, square, circle).

This same sort of nipple-in-the-middle can form when starting in the middle: a top-down hat, a hexagon or octagon motif for a patchwork blanket, or a shawl or blanket knitted in the round.

Below are several tricks to avoid this problem, worked both top-down and bottom-up. If you already HAVE this problem, this post ends a couple of tricks to get rid of the nipple, even after the project is finished.

AVOIDING AN ENDING KNIPPLE

Trick 1: Stop one round sooner
In this trick, instead of working to, say, 8 stitches on a hat top or motif center, you'd stop one round (and one set of decreases) sooner, when, say, 16 stitches remain. Drawing the running yarn up through the larger number of stitches helps prevent a nipple because the stitches have to stretch further to the middle, thus flattening them. However, if you draw the yarn through this final round too tightly, you may end up with the opposite problem: a pucker instead of a nipple. Therefore, adjust the tension with a mild hand.

Trick 2: Kitchener stitch (aka grafting)
Instead of drawing up the running yarn through the final few stitches, you can Kitchener stitch (graft) the last few stitches together. This makes a flat join instead of a rosette, and finishes a circularly-knit object with a pleasant oval center. This is the classic ending to sock toes, and one of the ideas behind the "truly flat hat top," but this idea also works with very well for glove fingers and mitten tops.

Trick 3: Smaller needles
Knit the last few rounds with a smaller needle, then finish off by drawing the tail end through the last few stitches. This trick simply puts less yarn in the middle, so there is less yarn to pouf up.

Trick 4: Do not wind the yarn around more than once to hide the tail
Recently, while experimenting with new tricks for gloves, it came to me that glove fingers need a different ending technique than that I had been using for hats. When ending hats it has been my habit to draw the yarn through the center stitches not just once, but to continue around the circle again maybe two or three more times, in order to hide the tail end. While this is a simple solution to hiding the tail, the downside is that all this extra yarn makes quite a hard knot: a knot which might look unattractively nipple-y and, when worked on gloves, is quite annoying to the sensitive fingertips. Even for hats, I believe I will avoid winding around in the future.

The simple fix is to go around with the tail once, plus ONE extra stitch to avoid any gap, and then to skim in the end elsewhere, so as NOT go around again and again through the center rosette of stitches. For glove fingers, this works particularly well when combined with working the entire fingertip on a smaller needle to yield smaller, firmer stitches: the resulting thinner fabric allows greater dexterity when wearing gloves.

AVOIDING A STARTING KNIPPLE

Trick 1: The disappearing loop cast on
There are several ways to start from the center out. The famous "Emily Ocker's" cast-on, of which you may have heard, actually results in quite a bulky set of center stitches PLUS hard little knots. I prefer the knot-less disappearing loop cast on. Disappearing loop is particularly effective when combined with the previous trick of using smaller needles. In other words, if the disappearing loop cast-on, as well as the first few rounds of the knitting are all worked on smaller needles, the amount of yarn available for nippling-out out in the middle is markedly reduced.

Trick 2: The umbilical cord cast on
The umbilical cord cast on is a waste-yarn method. A small tube is knit in waste yarn and the item being knit is started at the bottom end of this tube. Working a waste-yarn umbilical cord means your first garment stitches are more likely to exhibit even tension, which helps eliminate the nippling effect--firm tight stitches are less likely to nipple up than loose or uneven ones. Like the disappearing loop cast on, the umbilical cord cast on can be started on smaller needles to reduce the amount of yarn in the middle of the work.


FIXING THE PROBLEM AFTER THE FACT
Trick 1: Unpick and draw through
A few years ago, after one of my kids lost a winter hat for the nth time, I was looking over some old hats to get through the rest of the winter, and found one I'd knit years ago. This old-timer featured nipple-in-the-middle. The kid refused to wear such an object, so the fix went like this: In the first round of this top-down hat, I snipped a single stitch, unpicked and unraveled the yarn and caught the live loops on a thin set of dpn's. Once the live loops were securely caught onto the dpn's, I re-finished the center as if the hat had been knit from the edge-in. In other words, the fix was to run the unpicked and unraveled end through the live stitches. In principle, this is the same idea as snipping a stitch and unpicking a row to get live loops on the needle, on the way to changing the length of a garment. Another, slightly different way of conceptualizing this trick is that you are treating the first round as a waste-yarn provisional cast on.

Variations: Now, it may happen than when you snip and unpick, the resulting tail is simply not long enough to draw through the live loops. This is most likely to happen when the end has been worked in and snipped off before discovering the nipple problem. It would, of course, be difficult to firmly splice in additional yarn so close to the end. Luckily, however, there are three good solutions to this problem.

First, the classic solution of hand-sewers when faced with a too-short end is to insert the needle into the fabric most of the way and THEN thread it with the too-short end.This trick can be adapted to the top of a hat: insert the needle into perhaps three or four of the top (ending) stitches, until only the eye of the needle remains exposed, and then thread the exposed eye with the short end. As the needle is drawn through, the short end, will, of course, pop loose of the needle, but not before it has been worked through the few stitches into which the needle was inserted before threading. The needle is then re-inserted through the next several stitches, then re-threaded and the process repeated until the short end has been worked through all the live stitches PLUS one (to avoid a gap). The needle is then skimmed in through some stitches on the inside of the garment, the tail threaded on one last time, and the needle drawn through, losing the end of the short tail in the woolly loops in the back of the fabric and thus skimming it in.

The second solution to a too-short end is unravel enough extra stitches so that the tail IS long enough to thread onto a needle, and then draw the tail through these stitches, adjusting the tension so that a small attractive hole is created in the center of the work. In other words, when you unpick/unravel enough stitches so that the tail is long enough to thread onto a needle and draw through, you may find that you have so many live stitches that it would create a pucker if you were to draw the tail through tightly. Therefore, instead of drawing the tail through tightly, adjust the tension so that the tail draws the live stitches together into a neat rosette framing a small hole.

While a small hole looks very well in the middle of flat-knitted motifs such as blanket squares, it may not look so well in the middle of a hat. You can, obviously, cover the hole with a pom-pom or a tassel of one sort or another, but a third, more structural alternative is to unravel even more stitches, until your end is long enough to Kitchener-stitch with, and then Kitchener stitch shut the opening, making a fine oval ending to the formerly nipple-y hat. Alternatively, once you've ripped back far enough to yield enough yarn for a splice, you could do a Russian join or a back join (or a felted join or an overcast join or an overlap join) then proceed as though ending a hat instead of starting one.

Trick 2: Draw through without even bothering to unpick
A different situation with nipple-in-the-middle happened when I knit a cotton bag. Although started with the usually-reliable disappearing loop cast on, the stiff cotton did not squish together as wool would have, and the result was a nasty bump. As it happened, this bag was to be lined, so the inside of the bag would be my secret alone. Being fairly lazy, my fix was to simply thread a needle with a strand of the cotton yarn, locate the third round in, then draw the yarn through those stitches from the inside. Below is a photo of the outside, after the fix.


In other words, the stitches of the third row in were simply drawn up with a single strand of cotton yarn without even bothering to unpick them. This trick pooched up the nipple to the inside where it would never show (photo below) while tightening up the outside into true respectability (photo above).

This trick would obviously not work on a glove finger, but for utility knitting such as a cotton bag, it was an effective solution with no snipping involved, and an elapsed time of perhaps 30 seconds.

Photo credits: Barry Toranto.

Have a Happy Thanksgiving, everyone!

--TK
You have been reading TECHknitting "eliminating nipple in the middle from knitwear: get rid of the bump"

Okay...What Would You Do?


Last half-day at work before a four day holiday weekend, virtually none of my co-workers are in the office and I've completed all critical tasks and gotten ahead on future tasks.

Should I Blog?
I have virtually no knitting content or progress to boast about, and I typically do my blogging outside of working hours. I can't knit at work, but blogging activity could be perceived by casual passers-by as productive work.

Such a quandry, and you KNOW how I hate being bored.

I even tried catching up the typically reliable time-suck, Ravelry Forums, but there was hardly any activity out there either.

Sheesh...what's a slacker supposed to do?

Current Knitting
I do have a pathetic progress report on my current sock project.


So far, no knots in this ball of Kureyon Sock, but I know I shouldn't get my hopes up for the second sock will surely not be as knot-free.

I have also done a few rows since the last blog on the stranded knitting sweater, but a progress picture would just look like the last one.

Readers' Comments/Questions
Regarding the stranded sweater, Barb B. asks, "Are you doing buttons kind of like a "henley" style?"

Yes, that's exactly what I was trying to describe...thank you.

Supporting My Local Yarn Stores


While James was here, we were able to to make it to four different yarns stores, and I ended up buying at least one sweater's worth of yarn in each store.

Latest Yarn Purchases
First of all, if anyone is in the market for a large wooden yarn swift (either for themselves or as a great knitter's gift), Amazon has it on sale right now for around $50 (it usually retails for about $70).

Also, for those of you on Ravelry, you can check out my stash there (if you already have, this section of the blog will be repetitive). I also got quite a nice gift from Carol at Black Bunny Fibers.

I'll start with the gift, since it was my favorite (including the card visible in the background).


The yarn is hand-dyed merino/tencel blend, that I will use for socks. Here's a closeup, since the colors are so subtle and so sublime.


I bought 11 hanks of Berrocco Peruvia Wool.


It was softer than Cascade 220 and had some really nice colors (even though I selected gray...much to James' dismay).

Then I picked up some Claudia Handpainted fingering weight yarns.


Not sure what I'll be using the Claudia for, but I liked the colors.

I picked up some more Koigu KPPPM in colors that I thought would look nice together.


Then I found this lovely yarn. It's Jojoland Harmony in a very fine laceweight.


This yarn was was very inexpensive, and had some spectacular colorways.

I couldn't resist picking up some of the Malabrigo Merino Laceweight.


I thought the colorway was rich and interesting, and the yarn was softer than corn starch.

I can't believe no one had told me that Manos starting making a Silk Blend yarn.


The colors are just wonderful and deep and vibrant. I have no idea what I'll make with this, but whatever it is, it will be very nice.

Finally, I picked up two different colors of Rowan Felted Tweed.


I found the tan color first and liked it, and then when I saw the red, I had to have it as well.

Suffice it to say, I have enough yarn due to James' visit to keep me knitting for at least the upcoming year.

Current Knitting
I was able to finish the back of the Alpaca Herd Jacket and then work up to the sleeve shaping on the left front.


This is going to be one warm and soft jacket when it's finished.

Readers' Comments/Questions
Suzan asks, "Question: do you think Thanksgiving is more important than Christmas?"

I don't think Thanksgiving is more important than Christmas...no. I will say that I enjoy the restful, peaceful quality of Thanksgiving a little more than the frenetic chaos that Christmas usually presents, but that has more to do with how we celebrate both holidays as opposed to the inherent importance of each.

Adam Spector Hodgkins Memorial Fund