Tuesday, June 30, 2015

Topic Swapping

Comments from the last post amazingly kept creeping away from the initial topic of gay men's addiction to crystal meth, and self-image issues, to meth labs and rural issues of drug use, despite Tricky's attempts to point back to the issues in the blog.

Gay 101
First of all, I'd like to thank Michael (Tricky Tricot) for first posting the Village Voice article and his valiant attempts to clarify the issues. He has fast become my favorite blog to read for a number of reasons, and I have had personal correspondence with him over the last couple of days letting him know I am in total agreement with the ideas he has stated.

Second of all, I wanted to address some of the concepts of living as a gay man in this society. And I will speak only from my own personal experience. From the various comments, it is clear there are folks that have no clue of what it's like, and others that are pretty clear about what they do and don't understand.

There are a number of ways that I was barraged as a youth with messages saying that I wasn't okay:

1. Personal attacks both verbal and physical
2. Generalized homophobia displayed by folks using words like fag, even when they meant it as just geeky or feminine
3. Institutional homophobia displayed by organizations like the catholic church and the government

Personal Attacks
Whether on the playground in grade school, or having folks yell "faggot" out their car window while passing a gay bar or physical attacks such as Matthew Shepherd (which happen a lot more than most folks will ever hear about), all these are very clear, and very direct messages that being different isn't acceptable or sometimes isn't even safe. I personally don't think there is much that can be done about this except taking instances of ignorance as opportunities for education.

Generalized Homophobia
Like Kathy, I found some of the comments about "being okay" very patronizing, but it's hard to tell the tone of a message without hearing it directly from someone's mouth. As mentioned in the Village Voice article, gay men are either ignored in the media, or shown very one-dimensionally. Even shows like Will & Grace, and Queer Eye For The Straight Guy reduce the humanity of gay men by using them as modern day minstrels.

When I hear gay-disparaging words, I have come to learn to quickly categorize them as either good-natured with no intention of hatred (you'd have to be a very close friend or gay yourself for me to hear it this way), ignorant (which is the opportunity for education) or hateful (which can sometimes be an opportunity for education, but usually is an indication to run away quickly).

Institutional Homophobia
When the cardinals in Rome send out missives indicating that gay men are less than in any way, it is a very powerful message. When principals of high schools allow physical and emotional abuse to continue based on a student's actual or perceived sexuality, it sends a very powerful message. When corporations allow their married employees to take advantage of benefits that committed gay couples can't, it sends a hurtful message. When the president of the United States says that he wants an amendment to our country's constitution to specifically discriminate against gay men, it is a clear statement of how illegitimate we are in his eyes.

In those instances, I work to change where I can, support those institutions that embrace equality, and specifically withdraw my participation from those organizations that would have me be less than other (if I can).

Addiction
I do believe that personal responsibility is a necessary component to recovery from any addiction. However, I think it's also very important to know what factors were in place to make a person susceptible to addictive behavior.

I do blame homophobia in large part for the high numbers of alcohol, drug and sex addiction in the gay world. And I certainly see homophobia as a factor in all that I am today (including any addictive behavior), and to ignore that would be foolhardy. Taking responsibility for how I react to my environment is how I can recover into a more healthy human.

Knitting
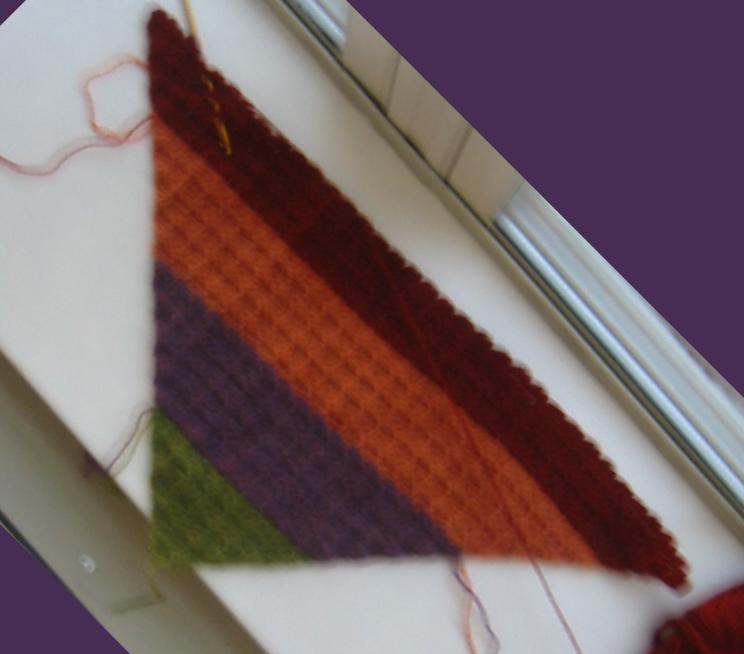
I have completed the collar and sewn up the shoulder seam and started the first sleeve of the wool/hemp pullover.

Pictures, and more knitting content in future blog entries.

Not suitable for children?

Even though I try really hard to stick to my knitting, sometimes the goofiness of the web just begs for comment. I've always thought myself the most harmless of women, so I had to laugh (and laugh!) of the big bad "rating" TECHknitting earned from THIS site. The reason TECHknitting did not get a "G" was because this blog uses the word "pain" twice and "kill" once. And indeed, so it does.
  • Frogging the Russian join was once described as a "pain" and once as a "royal pain."
  • When first learning to blog and spending massive amounts of time going up the learning curve, an early post concluded by saying I had to sign off because my husband was "ready to kill me."
Oops, there go those words again! Perhaps TECHknitting (that notoriously bad*ss knitting site) may now aspire to an "R" rating?
(Forgive me if you do not share my mirth--but I haven't been tickled by anything this silly in a l-o-n-g time!)

Addendum--after publishing this post, the new rating is PG-13.

--TECHknitter

The Other Red Project


Last week I mentioned I had another project that was red (in addition to the Ichida lace that I finished and the pullover vest that I started).

A New Skill?
I'm not sure if I will pursue this any further, but I decided to teach myself to sew.

I figured the characteristic of perseverance would extrapolate well to sewing, but I didn't realize that the whole new lexicon and the lack of complete directions in sewing patterns would be quite so daunting.

Maybe it's just because I've been knitting for so long that I take certain things for granted, but it seems that knitting patterns assume only that you know how to cast on, knit and purl and give directions for all other stitches. Knitting patterns also give all the directions necessary to make a garment (even if the pattern only directs you to "reverse pattern on second side" instead of including instructions for it).

Sewing patterns on the other hand seem to assume that you know the order in which to put together a garment and other skills such as hemming and easing in and how to sew in elastic, etc.

Initially, I decided to use a relatively simple pattern to learn some of the basics, and I made a pair of boxer shorts (men's underwear was one of my first knitting projects, so I figured I'd stick with it). Other than sewing together the two fronts of the legs and the two backs of the legs to make boxer skorts instead of shorts (yes, I fixed this error), and having to re-sew the elastic band a few times, this pattern was relatively easy (sorry no pictures).

Then I decided to make a shirt.


Just unpacking all the pattern pieces, reading all the instructions and ironing out the fabric took quite a bit of time. But I followed the instructions and I watched a few YouTube videos on making mens' shirt collars and I was able to come up with a pretty good facsimile of a men's shirt.


I was even able to figure out how to use the buttonhole feature on my sewing machine and create decent button holes. Overall, I was quite pleased, and Thaddeus actually wore the shirt last night out in public. I guess it couldn't have been that bad.

Though, I may decide to limit my sewing to just quilting. Not sure all the work is worth it.

Current Knitting
I also made quite a bit of progress on the Rowan Felted Tweed Pullover Vest I've been working on.


I've finished the back, and almost completed the ribbing for the front, so it's moving along quite well. The sweater is looking like it will be a great basic man's sweater vest, and I may just decide to publish the pattern.

We'll see how it turns out and then decide.

Readers' Comments/Questions
Carol writes, "Hey, you didn't answer MY question. Hmph." (referring to her question about whether the other red project was the millinery hat work I was doing to get into the Red Hat Society).

Sorry Miss Carol for ignoring your question. Hopefully the sewing section of this blog entry answers your question. Also hope your WEBS book signing went well.

Monday, June 29, 2015

Origami Fun


I've always considered knitting to be kind of magical, in that I can create fabric using yarn and needles. Similarly, I've always found origami to have that same kind of appeal.

Complete Tangent
I was entering all my knitting, spinning, weaving and crochet books into LibraryThing.com, as Marilyn had suggested, and one of the books that was in my craft library was a big, colorful book, called Practical Origami, by Rick Beech.

Just flipping through the book out of boredom, I found a design for a covered box, with a divider in it, and decided to try my hand.


I was quite pleased with the result, especially with how small I was able to make mine.


Don't get me wrong, this is a relatively simple design, and I'm not overly talented at origami, but I found this fun to do. I don't plan on replacing my knitting with origami anytime soon.

I couldn't find an on-line design for the box with divider, but here's one with just the box and the top, if you'd like to try it.

Current Knitting
In addition to the two scarves mentioned on my last blog post, I've completed yet another fucking scarf. Here are the three scarves to bore you silly.


This one was a repeat of a previous scarf, using the Louisa Harding yarn. For a mostly nylon blend, I find this a very appealing yarn, and would gladly consider making a garment or a baby blanket or something else with it...oh, not baby blanket...it's got mohair.


This one will probably be one of the first scarves to sell. It's black, it's big and it's warm.


Finally, this one is by far my favorite color scarf so far. I always seem to like colors that I couldn't possibly get away with wearing...why is that?

Contest Update
Marilyn has a great "open mic" topic on her blog right now about asking blog readers for money. I never realized what a difference of opinion folks could have on this. Naively, I just thought most folks felt pretty much like I do.

Along those same lines of being completely deluded, I have to say the QueerJoe contest benefiting Year Up is going extremely poorly, and I'm not exactly sure why.

I know the prizes aren't great, but that's never been a big factor before. I'm not sure if folks don't agree with my choice of charities, or if folks are just tired of supporting blog charities in general.

To maintain my current level of delusional denial, I will just believe that folks haven't gotten to it yet. I include the link for direct contributions again, and the PayPal button for my account just in case folks do want to contribute, but haven't.

Readers' Comments/Questions
Thanks for personal stories of the need to address urban education. While I find them disturbing as hell, it confirms for me the need to have more attention and money focused on this issue.

Just Not Feeling It


Is it the pattern stitch? Is it the colors? Is it the fabric? Is it the weather? Or is it just how I'm feeling at the moment?

Whatever It Is...
...I'm just not enjoying the progress on the Impressions pullover vest. It's just not one of those projects that I look forward to running home and working on each night. I'll continue to work on it, and I will definitely finish it, but I got distracted with a delivery of yarn this past Saturday.


Sean at Woolcott & Co. is hand-dyeing sock yarn and selling it in his store. It's not on the web site linked above, you just have to know about it and call him to order it.

I loved the colors he chose, so I bought one of each and I've already cast on for my first of three pairs of Woolcott socks.


You'll note I accented the top of the sock with a contrasting color. I will use the same color for the heels and toe of this pair. I figure I will mix and match all three colors eventually.

Current Spinning
After finishing the singles of Mohair/Merino blend from Mindy at Puff The Magic Rabbit, I was considering wrapping them around a two-ply tussah/cashmere blend that I started working on back in January of 2008, but never finished. I set my mind to finishing it so I could get this lovely yarn combination done.

When I finished plying the tussah/cashmere, I experimented with adding the mohair, but it wasn't working well, so I just decided to leave the tussah/cashmere as a double-ply yarn and I'll double-ply the mohair/merino later.


Just as a side note, I love how this yarn turned out. I was able to keep the colors separated in such a way that I used up all the fiber. I ended up with a little over 400 yards of beautiful yarn, plus I'll get an additional amount of beautifula mohair/merino when I ply that.

Sunday, June 28, 2015

Working in ends on multicolor knitting--part 2: the back join

The previous post showed the Russian join. That join is unquestionably an improvement over leaving the ends hanging, and ... (cue ominous organ music here) ... having ALL those ends waiting for you at the end of the project. However, the Russian join has several annoying tendencies:
  • it's hard to get the join just where it ought to be
  • ripping back (frogging) to correct an error is a royal pain--the bits of yarn are so precisely calibrated lengthwise that no slack remains for correcting a mistake.
  • it's S*L*O*W
Here is a better join, an un-vention* I call a "back join." The back join gives you greater control over the exact place where the join will occur, you can easily pull it out and do it over if the join is not quite in the correct spot, and it allows you to leave extra yarn hanging on the back until the end of the project--so ripping to correct is easier. Further, unlike the Russian join, the back join can be modified to work in the tails over several rows--the extra bulk from the worked-in tails need not be confined in the several stitches on either side of the color change.

NOTE ADDED 7-1-2007:
DUE TO FEEDBACK INDICATING THIS POST WAS CONFUSING, A SIMPLIFIED VERSION WITH ADDITIONAL ILLUSTRATIONS WAS POSTED ON JULY 1, 2007 (CLICK HERE). THE INFORMATION IN THE BELOW POST REMAINS CORRECT, BUT IT MIGHT BE EASIER TO READ THE SIMPLIFIED VERSION FIRST.

Here's how to do the back-join in circular knitting:
Suppose you are knitting with lavender yarn, and you want to switch colors, and knit with purple. With the lavender yarn, knit to the exact spot you want to change colors from lavender to purple. Mark the standing yarn just past the end of the last lavender stitch. (standing yarn=yarn coming from the ball). A paperclip or a straight pin, or anything small and handy will easily mark the spot. For me--being an impatient person by nature--hunting out a pin or a clip would slow me down, and being a continental knitter by preference, my left hand is relatively free, so I choose to mark the spot by pinching it.After marking the spot, unravel the three stitches you most recently knit, returning the raveled-out stitches to the left needle. If you are pinching the yarn, keep hold of it.Take the purple yarn, and fold it over the lavender yarn at the exact spot you have marked or are pinching. In this way, you are interlocking the yarns in exactly the correct spot where the color change will not show on re-knitting. Leave a plenty gracious tail on the purple yarn--several inches, at least.Re-knit the next three stitches using the doubled lavender strand of folded-back yarn. Do you see what you've done? On the lavender yarn, you've magically transformed the standing yarn into the tail of the yarn, and worked this tail in backwards as you knit forwards! (Knitting the folded back doubled strand has always seemed to me like a tiny time machine--going backwards and forwards at the same time!)

When you've got these three lavender stitches knitted with the doubled strand, snip off the yarn going back to the ball. Again, leave a plenty gracious lavender tail hanging on the back of the fabric, just in case you'll need to rip out in the future.

The next step is to knit the next three stitches in purple yarn, again using a doubled strand of folded yarn--purple yarn this time. Again, the doubled strand of purple is composed of the tail yarn held alongside the standing yarn. The result: The lavender yarn and the purple yarn are interlocked on the back of the fabric, and the tails of both are worked in.If the color change of the join somehow hasn't come out in quite the right place, only six stitches stand in the way of correcting that--rip the six double stranded stitches back and start again. Also, if you find a future need to rip out more of your work, there is excess yarn hanging on the back of the fabric, just waiting for you to use it for correcting a mistake. When the project is finished, wash and block it, then gleefully snip off all the excess ends about 1/2 or 1/4 inch from the fabric back--they've already been worked in! In wool, after few more washings, any tails that haven't disappeared by being matted onto the fabric surface, can be clipped level with the face of the fabric. In slippery fibers--acrylic, cotton, linen, bamboo, and the like--you're probably better off leaving a short tail on the inside for all time.

Modifications:

1) REDUCED BULK BACK JOIN If you do not care for the bulk of six doubled stitches in a row (3 lavender, 3 purple) try this. Work the lavender stitches in as usual. However, instead of working the tail of the purple yarn into the first three purple stitches after the color change, leave the purple tail dangling on the back of the work and knit a whole round. When you have come to the joined color change-spot on the next round, the purple yarn will still be dangling back there. Now pick it up, hold it together with the standing yarn, and knit it into the first three purple stitches in this SECOND round. These three doubled purple stitches will be separated from the first three doubled lavender stitches by one row--making the lump in the fabric less concentrated. This reduced bulk join "jogs" where the color changes. In a circular knit garment where the "jog" would be a problem, you can make this reduced bulk join "jogless"

2) JOGLESS BACK JOIN. If you are making colored stripes in the round with only two colors, there is no need to work in the ends--normally, you would carry the yarn of the second color behind the stripe of the first color. However, if you're using many different colors, then carrying the yarn behind from stripe to stripe is not an option. You might like to combine the back join with the jogless stripe technique (jogless joins are described in the TECHknitting post of 1/27/07). Here's how:
(1) Knit the last three lavender stitches with a folded back doubled strand. Switch to purple, but knit ONLY with the standing yarn--leave the tail dangling on the back of the fabric.
(2) When you come back to the color-change spot on the second round, SLIP the first purple stitch which you knit in the round below.
(3) knit the following three purple stitches with the doubled stand (that is: knit the second, third and fourth purple stitch of the second round with the tail yarn--which you will find dangling where you left it on the round below--held together with the standing yarn, to make a double strand).

Here is an photo of both fabric faces of a jogless back join, "in the wool."
To make a back join on back and forth (flat) knitting, locate and pinch a spot just past the last lavender stitch in the last lavender row. Unravel the last three lavender stitches you knit, interlock the lavender and purple yarns, re-knit the last three lavender stitches with the lavender standing yarn PLUS folded-back standing yarn. Snip the lavender yarn, leaving several inches of tail. On the next row, knit (or purl) the first three purple stitches with a double strand made of the purple tail yarn held alongside the purple standing yarn. If you don't want two rows of double yarn, one above another, you can modify the join to reduce bulk: leave the tail hanging on the first purple row, then wait until the second pass-through in purple to knit in the purple tail.

Last note: After you have located, marked (or pinched), raveled out and re-knit several sets of three stitches, you will know instinctively where to locate the interlock color change point WITHOUT having to knit, mark and ravel out--you'll be able to interlock, fold back and knit without any break in your rhythm. At this point, I believe you will find the back join far faster (and more satisfactory) than the Russian join.

*An "unvention," is a knitting trick which doubtlessly has been invented before, but which is revealing itself to the unventor anew.

--TECHknitter

PS:  Here is a link to a post with 10 (!)  different methods of working in ends in knitting, eight of which are "as you go."
(You have been reading TECHknitting on: the back join.)
Gay Secrets

In writing this blog, I often capitalize on the fact that it can be intriguing for some folks to read about the life of a gay man.

Secrets Revealed
One of the biggest secrets in the gay world today isn't intriguing, it's frightening.

There is a new epidemic that is killing gay men, and like the last one, no one seems to want to talk about it. More and more gay men are "experimenting" with crystal meth, and the effects are proving to be as addictive and deadly as folks who try crack or heroin.

For those that don't know, crystal meth is one form of the drug, methamphetamine hydrochloride, which comes in clear, chunky crystals, and is usually inhaled or smoked. It is also called "ice," "crystal," "glass" and "tina."

It produces an extremely high level of euphoria, and it is used as a sex-enhancing drug by many men in the gay community. Unprotected sex is often associated with the use of crystal meth, and along with the addiction, many gay men are converting to seropositive HIV status. Although, with current HIV treatment drugs, most of the men are dying of their addiction before AIDS can take them.

While some of the more self-righteous folks might say that it's their own damn fault for doing drugs, I believe this problem clearly stems from the constant barrage of negative self-image messages gay men hear (both consciously and unconsciously) throughout their lives.

There is an excellent article by Patrick Moore in The Village Voice which folks should read that most closely reflects my feeling about this issue.

Other Weekend Fiber Activity
It's hard to segue from that to fiber, so I won't. I was able to get in some spinning this weekend.


I should be able to finish up with this color if I get in some quality spinning time this coming weekend. I'm not sure what color I plan on going to next. Probably some navy blue.

Readers' Comments/Questions
Carol S. mentions that she got no mention for not being at the knit-get-together this past weekend.

She's right, I forgot to mention that she wasn't there. We missed her dreadfully. Other than the carrot cake and IK review, we sat around and bemoaned her absence. In her place, we put Bi-Polar Betty as a substitute. While Betty was mildly amusing, she was no substitute for the sharp wit and stunning beauty of Carol S.

Jon asked what kind of icing was on the carrot cake.

It was a pretty standard cream cheese icing. I also like carrot cake cold, and it was refrigerated before serving. The local Mennonite market (like an Amish market in case you're more familiar with one of those) sells desserts that spare no fat or sugar, and this cake was no exception. If they hadn't run out of cocunut cakes, I would have served that instead. Maybe next time.

Fully lining hats with polar fleece

click any illustration to enlarge
Lining handknit caps with polar fleece is a good trick to know. (Click here for further information about polar fleece.) Lining with polar fleece can make too-big hats fit, and it eliminates wool itchiness from sensitive foreheads.

TECHknitting blog has already shown how to line knitted hats with polar fleece headband style; today's post shows how to fully line a hat. Basically, with this trick, you make another hat of polar fleece, then sew that inside your knitted hat. With a lining in a heavy weight of fleece, the hat will be suitable for arctic expeditions--excellent where I live (Wisconsin)--but in more temperate climates, you may want to search out a thinner fleece for your lining so the hat won't be impossibly hot.

Step 1 (below): Polar fleece stretches more from selvedge to selvedge than along its length. Cut out a strip from the "wide" way on the fabric (as shown by the "direction of stretch" arrow). The strip should be approximately 10 or 11 inches high and 24 to 26 inches wide. This strip will become the inner lining hat.
Step 2 (below): Wrap the strip around the intended wearer's head with the "not-so-good" side facing out and pin it shut. It would be wise to wear the pinned strip around the house for some time--what seems comfortably snug on first pinning can come to feel ear-numbingly tight after extended wear.
Step 3 (below): Sew the tube shut as pinned. If you have a serger, use that. With a sewing machine you can sew a simple straight seam. If you are sewing by hand, use the back stitch.
Step 4 (below): Trim the excess from the seam. The illustration shows pinking shears, but you can trim with ordinary scissors. Polar fleece does not unravel, so you can trim closer than with woven cloth. An approximately 3/8 inch seam allowance is good, but bold souls can trim as close as 1/4 inch, while nervous sorts can trim to a standard 5/8 seam allowance. If you do have a sewing machine, you might wish to re-sew over the cut edge with the machine's zig-zag or overcast stitch, but this is not necessary.
Step 5 (below): Have the intended wearer try on the tube. Pull the tube down well over the forehead so that you don't accidentally make the lining too shallow. Pin shut the top of the tube so that it comfortably conforms to the shape of the wearer's head. Below is an illustration, and at this link is a photo of the process in real life (Ravelry link).
Step 6: Just as you sewed the back seam of the tube in step 3, so now you will sew the top of the tube shut. Let the actual sewing of the seam be approximately 1/2 inch above the pins, and this should allow plenty of wiggle room.

Step 7: Just as you trimmed the excess from the seam allowance in step 5, so you will trim the excess fabric from above the top seam. Use the same width of seam allowance as on the back of the tube--somewhere between 1/4 inch and 5/8 inch.

Step 8 (below): OPTIONAL Have the wearer try on the sewn-shut tube. At this point, if you like, you can adjust the shape of the tube to be more anatomically correct by flipping up the front of the hat until the tube sits comfortably on the head. Once the comfortable amount of front flip has been determined, mark the flip with a line of pins.
Step 9: If you did step 8, then in this step, you trim away the excess fabric from the front of the lining by trimming along the pinned line. You want to flip up and trim from the front, rather than the back so that you are not cutting through the back seam--cutting the back seam could possibly encourage that sewing in that seam to run out, while cutting in the front creates no problems at all. Remember, polar fleece fabric does not unravel.

Step 10 (below): You have now created a custom lining which will fit the wearer. At this point, you want to sew the lining into the hat. A polar fleece lining is sewn into a hat ONLY AT THE BOTTOM EDGE of the hat. There is no reason to sew it in along the top. By having the lining free-floating in the hat (attached only at the bottom edge) the hat will lay far smoother on the wearer's head than if the lining were attached at the top of the hat too.

Here is the how-to trick for pinning the lining evenly into a hat (or should I say--for pinning the HAT evenly inside the LINING!?)

Begin by turning the hat INSIDE OUT. Fit the lining OVER the hat, with the sewn seams of the
lining facing the inside of the hat. In other words,
  • the hat will be encased, inside-out, inside of the lining
  • the good side of the lining will be showing, and
  • the not-so-good side of the lining (the side with the seams) will rest against the inside fabric of the hat.
Align the back seams.


(If you think you may have seen this diagram before, you have! This is the identical diagram from the post on headband-style lining, and, in fact, the two methods are the same!)

a: Holding the hat (gray shape) inside the lining (blue shape), S-T-R-E-T-C-H the hat and the lining with both forefingers into a long shape which can be stretched no further. This automatically centers the hat inside the lining. Pin the lining to the hat in these two spots.

Do you wonder how you can pin in the lining while your hands are inside the hat and band, stretching everything smooth? You can ask someone to help you, of course, but if you are alone, you can take a shortcut by pinning in one contact point BEFORE you start the stretching-out process, then pinch the hat and lining together where you find the second contact should go. Just be sure not to prick yourself with the pre-set pin, which would go right against one of your stretching fingers.


b. along one side, divide the length between the two pins in half by again stretching the hat and the lining until they can stretch no further. Pin this third contact point.

c. along the other side, repeat step b. Four points are now pinned.

d. again stretching between two contact points, set a fifth contact point at the half-way mark between two already-set pins.

e. repeat the "stretching to find the half-way point" 3 more times until a total of 8 contact points are securely pinned down.

f. the perfectionists among us may want to again halve each side length for a total of 16 contact points.

Do not be alarmed if the lining is larger than the hat OR if the hat is larger than the lining. Once you have sewn the lining in place, the hat and lining will fit one another very well. The larger item, whether hat or lining, is eased to the smaller one by means of stretching out the smaller item as you sew, stitch by stitch, with the pins in place to divide the sections equally so all the ease does not wind up in one big lump on one side of the finished hat.

Thus, a too-large hat can be eased onto a smaller lining by stretching the lining out as the hat is stitched to it. When the sewing is done, the excess fabric of the hat will be distributed in tiny little bite-size pieces all around the lining. As the lining is released from stretching--as it shrinks back to near its original shape--it will take the too-large hat with it. Similarly, hats made of heavily textured fabric (ribbing, cables) will "draw in" much more than the smooth lining. Accordingly, the hat must be gently stretched to fit the lining.

To explain in different words: "Ease as you sew" is sewing jargon for stretching the smaller item (whether hat or lining) to match the larger item (whether lining or hat) as you sew the two together. When you have sewn the garment and the lining together and you take your hand away, you will see that they both lay smoothly together, regardless of the fact that the smaller one has been stitched into a new, stretched position.

As to which stitch to use, you can follow these instructions for the overcast stitch. I highly recommend sewing linings into knit garments by hand, rather than by machine: the end result is nearly always nicer, and the hand-sewn overcast stitch allows for a flexible and comfortable connection between the lining and the hat.

--TECHknitter (You have been reading TECHknitting on: "How to line a knitted hat.")

Saturday, June 27, 2015

Life Accellerated


Last Week in Albany is Very Hectic

Final Days
Critical presentations to executive management, tight deadlines for system updates, finalizing outstanding documentation and finalizing ongoing contracts are keeping me extremely busy at work.

Add to that, saying goodbye to good friends, packing up critical papers in my desk and getting sick yesterday with some sinus, chest cough, respiratory thing...I am a bit overwhelmed.

But that doesn't affect you...I just wanted to whine.

Current Knitting
I finished the front of the Faux Rib sweater and started on the first sleeve.


I wasn't looking forward to working the first sleeve because it meant that I had to do all the calculations for length and increases, but it really didn't take that much work. Sleeves can be some of the most boring part of a sweater project.

Other Fiber Stuff
When I start getting toward the end of a project, I look for any possible distraction or new project. So I started a little test project.


This is a crochet pattern known as Corner to Corner that Thaddeus' grandmother used to crochet afghans for many of her family, and Thaddeus has one that she knit for him. I've always wanted to try out this pattern stitch, so I thought I'd make a rather large swatch from leftover baby blanket yarn.

Readers' Comments/Questions
Liza notes, "Regarding your light placement issues: Why don't you stop before you're parked under the light?"

It seems unnatural to stop 10 feet behind the stop line at a light. I almost feel as thought drivers behind me would honk if I stopped back that far.
Knit Blog Friends

Getting to be with friends I know from knitting is always incredibly energizing.

Knit Get-Together
A few of the readers of this blog got together yesterday for lunch and knitting and gabbing. Marilyn, Kathy, Liza and Selma (all the way from Woodstock, NY) were there, as was a special guest, Marilyn's granddaughter, Liz.


We had lunch at the Stockton Inn in New Jersey (because something about Dorothy Parker happened there...don't ask me, ask Marilyn or Liza). And then we met over my house, where Thaddeus served carrot cake and esspresso.

We also reviewed the most recent issue of Interweave Knits. While I don't have a copy, Liza tells me it's worth the price for an article on Japanese textile bleaching techniques. After seeing a couple of awful designs, including designs by such well-known designers as Annie Modesitt, Nicky Epstein and Mari Lynn Patrick, I have some severe doubts about whether I will buy this issue.

Current Knitting
It seems I talked more about knitting this weekend than actually doing it.


I finished the back, attached one shoulder, and finished about half the collar. Pretty much, I have only two sleeves and a little finishing to do.

Readers' Comments/Questions
Elizabeth asks, "Have you finished Life of Pi?"

I finished it this passed weekend and it was everything I had hoped for in a book. If you've read this book, and didn't like it, or thought it was just okay, you should never take my recommendation for a book, because clearly we have different tastes.

School Violence


One of my favorite NPR shows is Fresh Air with Terry Gross. Yesterday, she interviewed two Philadelphia teachers who were attacked in two separate incidents, and seriously injured by students.

WTF?
I heard one of these guys interviewed a while ago...the math teacher who sustained a broken neck, broken shoulder and a brain injury. I was also speaking with a recently retired teacher in Springfield, Massachusetts. She was telling me a gruesome story of having a high school social worker stabbed and murdered right outside her classroom door by a student she had just disciplined the day before.

I can't help but be incredibly disturbed by these stories.

For one, I consider education to be one of the critical solutions this world has to the many of its problems, especially poverty, class differences and even crime.

But without a safe environment for students to learn, there will never be a chance for education to take place successfully.

I've been wanting to have a blog contest for a while, and this latest interview with Philadelphia teachers has prompted me to use a blog contest to support a charity called Year Up, one of the more well-run educational charities that is doing excellent work with inner-city education.

Blog Contest
Blog Contest is simple. Make a contribution, or in some way support Year Up (they have local volunteer opportunities, or the ability to donate goods, etc.). Just let me know via e-mail at queerjoe@comcast.net that you've done something to support them by July 15th at midnight, U.S. Eastern time, and I'll enter you in a drawing for one of three modest prizes:


Prize one: A copy of Kaffe's Classics
Prize two: A knitting project bag from KnitPicks
Prize three: A copy of Marianne Kinzel's Modern Lace Knitting

Please note in your e-mail which prize you would prefer, and I'll try to match the winners to their prize preference.

If you'd like to make a contribution directly on their site using a credit card, I don't need any verification of your donation...just your word that a donation has been made. If you contribution is less than $25, and/or you'd prefer to donate via PayPal, and you don't care about the tax benefit of your donation, you can make your donation to my PayPal account, and I will send all donations received this way to Year Up in one lump payment.

Click Here To Donate Via PayPal

I know the prizes aren't anything spectacular, but I do appreciate any support you could give to this very worthy cause.

Current Knitting
I finished two more scarves...I'll post pictures of them in my next blog entry.

Readers' Comments/Questions
Regarding the Boteh Scarf, Glen writes, "I was wondering if I could get the knit version of the pattern from you, because I haven't a clue as to how to convert a crochet pattern to knit or vice versa."

Actually, I don't have a specific knit pattern written up for this scarf, and I don't think I'll be writing one...sorry. But here's why, first, I don't like how it looks in knit format, and second, I don't want to take away from Kathy's lovely crochet accomplishment by bastardizing her design.

Regarding the knit/crochet scarf I did in Kaffe's Kid Silk, Franklin asks an exceptionally inciteful question, "I'm curious, does the crochet edging have a noticeable effect on drape or stretch?"

A little on stretch, and none on drape. I mimicked the looseness of the knitted fabric with the crochet, so the drape would stay the same (very loose and drapey). The crochet edging does provide a little more structure than the original knitted edge, and will definitely help keep the scarf in it's original shape.

Thursday, June 25, 2015

Working in ends on multi-color knitting--part 1: Russian join

Several readers have e-mailed recently, asking how to work in ends. This has also been a recurrent subject on several knitting boards.

IMHO, the best way to deal with ends is not to create any.

For working in yarns of the SAME color as you go, this LINK shows two different ideas:
1) "felting ends" also called "spit splicing."
2) Overlapping join

But, what if you're changing colors? A felted or overlapping join is out of the question, because you'll have color mismatch. A knot is a bad idea--a knot leaves a hard little nub, and very frequently, comes undone with wear.

Today's post illustrates a technique called the Russian join, which is the classic solution for pre-working ends in multi-color knitting.

Step 1 (left) Make a loop in your yarn by threading the tail of the yarn onto a SHARP needle and running the tail into the standing yarn (standing yarn=yarn coming from the ball). If the yarn is plied, run the tail through the plies, if the yarn is unplied (also called one-ply) just run the tail through the fibers of the standing yarn.

Step 2 (right) Repeat with the second color, so as to make interlocking loops. Knit with the resulting yarn.

There you go: no ends.

However, although this is a BIG improvement over working in a scad of loose ends at the end of a project, there are several reasons why you might find the Russian join to be less-than-ideal.
  • It is hard to get the join just where it ought to be--any imprecision in making the joint might give you a green stitch where you mean to have a pink one.
  • Stopping and hunting out a sewing needle and sewing in ends is slow--the rhythm of the knitting gets disrupted.
  • Because the tail is worked into the standing yarn BEFORE knitting, it's hard to control where it will end up.
  • Unraveling (frogging) is dicey--the bits of yarn are so precisely calibrated lengthwise that there is no extra slack for correcting an error.
For these reasons, you may wish to investigate an "improved Russian join" which has none of these drawbacks.  This improved join is called the "back join, check it out!

* * *
PS:  Here is a link to a post with 10 (!)  different methods of working in ends in knitting, eight of which are "as you go."


--TECHknitter
(You have been reading TECHknitting on: The Russian join)

Blogging and Training...


...at the same time.

Multi-Tasking
Yes, I am delivering a training (of sorts) and have time in between questions to write a little to keep my blog readers amused.

Or maybe, I wrote this at midnight last night on my own time and I just changed the date of publication...I'll leave speculation up to you.

I also get to check Ravelry through the day. Did everyone know there's a big brouhaha on the Herbert Niebling Ravelry forum?

Yes...it's all VERY exciting...it has to do with copywrite, and an octopus named Fleegle and moderators of the Yahoo Group for Nieblings. I will never understand how folks can get so riled up about something as beautiful as lace knitting. Especially when it competes for attention with my latest finished object.

Despite the fact that I don't know all the particulars (and don't really care) I have definitely chosen a side in this issue...in my mind, it's clear that a couple of folks are crazy and the rest aren't.

Current Knitting
I've done about five more inches of the Rowan Felted Tweed pullover vest and I am loving the yarn, loving the pattern stitch and loving the resulting fabric.


I had to include the tape measure in the picture to prove that I made some progress. And to make it easier for my metric-oriented readers, here's another picture.


Readers' Comments/Questions
Regarding the the Ichida lace project, Marilyn writes, "What are the finished measurements? And how many T-pins do you now own? I have a box with more than 200 of them."

The length of the piece is about 68 inches and the width is about 38 inches at its widest. I now own a total of 110 T-pins and a boatload more round-headed pins.

Maureen asks, "Do you miss working on it, now that it's done? I think it would feel like parting with a good friend!"

I enjoyed working on it a lot, but I don't miss it at all. It's actually quite refreshing to be working on US4 needles for the moment, but I will definitely be starting a new lace project soon.

Religion and Science


By a show of hands...how many of you have seen What The Bleep Do We Know!?

Or, More Recently...
...the more recently release, What the Bleep!? - Down the Rabbit Hole (QUANTUM Three-Disc Special Edition)?

I have to admit that this stuff just fascinates me.

My version of spirituality incorporates many ideologies. Everything from my religion-of-upbringing (Catholicism) to A Course In Miracles and even self-improvement seminars, like est.

All of the paths I seem to follow, all end up having a certain indescribeable commonality, that I choose to continue to investigate as part of my search for spirituality.

The recent What The Bleep movies have added another dimension to my ideas of what constitutes spirituality and understanding of who I am. I was very glad they came out with the follow-up DVD set, because I still have difficulties understanding much of what was covered in the initial movie.

Current Knitting
I had an impromptu birthday dinner I had to attend for a friend with three cats, so I put scarf production on hold for a while to create this little package.


Containing...


I just felted up a few little mice for her cats to play with and tossed them around in a little cat nip. Her kitties loved them.

I've also continued to work on more scarves, and I think they're getting better and better.


This one is made with Kaffe's Kid Silk, and uses a combination of knitting on the bias and a crochet edging. I think I will make a couple more like this.


This one is done with some silky-soft yarn from Louisa Harding called Impression (84% nylon and 16 mohair). I will also be making a few more of these.

Readers' Comments/Questions
Glen asks, "Where can I get that WONDERFUL pattern you used for the Boteh Scarf?"

I've mentioned it a number of times, so I'm not sure if this is a sarcastic question, but the pattern is available in the most recent Interweave Crochet magazine, the Spring 2007.